2026-05-31
Scaniverse to Blender from a Royal Caribbean cruise ship
openusdscaniverseblenderphysical-ailearning-log
Written from a Royal Caribbean cruise ship on satellite WiFi during the first session of the OpenUSD and Physical AI ramp.
The setup
I’ve spent 14 years doing network automation at Cisco, currently as a Senior Technical Advocate inside DevRel, with a side practice at Sierra Code Co doing AI consulting. I’m pivoting toward AI DevRel, and the specific role that matters this month is at NVIDIA on the Physical AI side of the GSI Developer Relations team. I have an intro call coming up with someone on that team, who’s deep on OpenUSD and the Omniverse Physical AI stack. I needed something more concrete than “I’ve been watching the talks” to bring to the conversation. The plan: do the entire real-to-sim pipeline end to end in one session, capture every friction note, and turn the friction notes themselves into the DevRel artifact.
The cruise ship is incidental but it ended up being the right constraint. Royal Caribbean satellite WiFi is metered, slow, and unreliable. Cloud GPU rentals were off the table from the start. Whatever I built had to work on a MacBook in airplane mode, exactly the constraint NVIDIA’s pure-Python OpenUSD authoring stack is designed for, even though the marketing assumes you’re sitting next to an RTX workstation.
The pipeline at the highest level
iPhone LiDAR scan (Scaniverse, Classic + Mesh mode)
  → USDZ export (~19 MB)
  → Blender 5.1.2 (USD import, Material Preview shading, viewport render)
  → PNG screenshot
That’s the loop. Every step is a single tool, mostly local, mostly free. No cloud GPU rental. The next iteration adds composed USD references on top, which is where the “non-destructive pipeline” framing starts to mean something concrete instead of being a phrase from a slide.
What I scanned
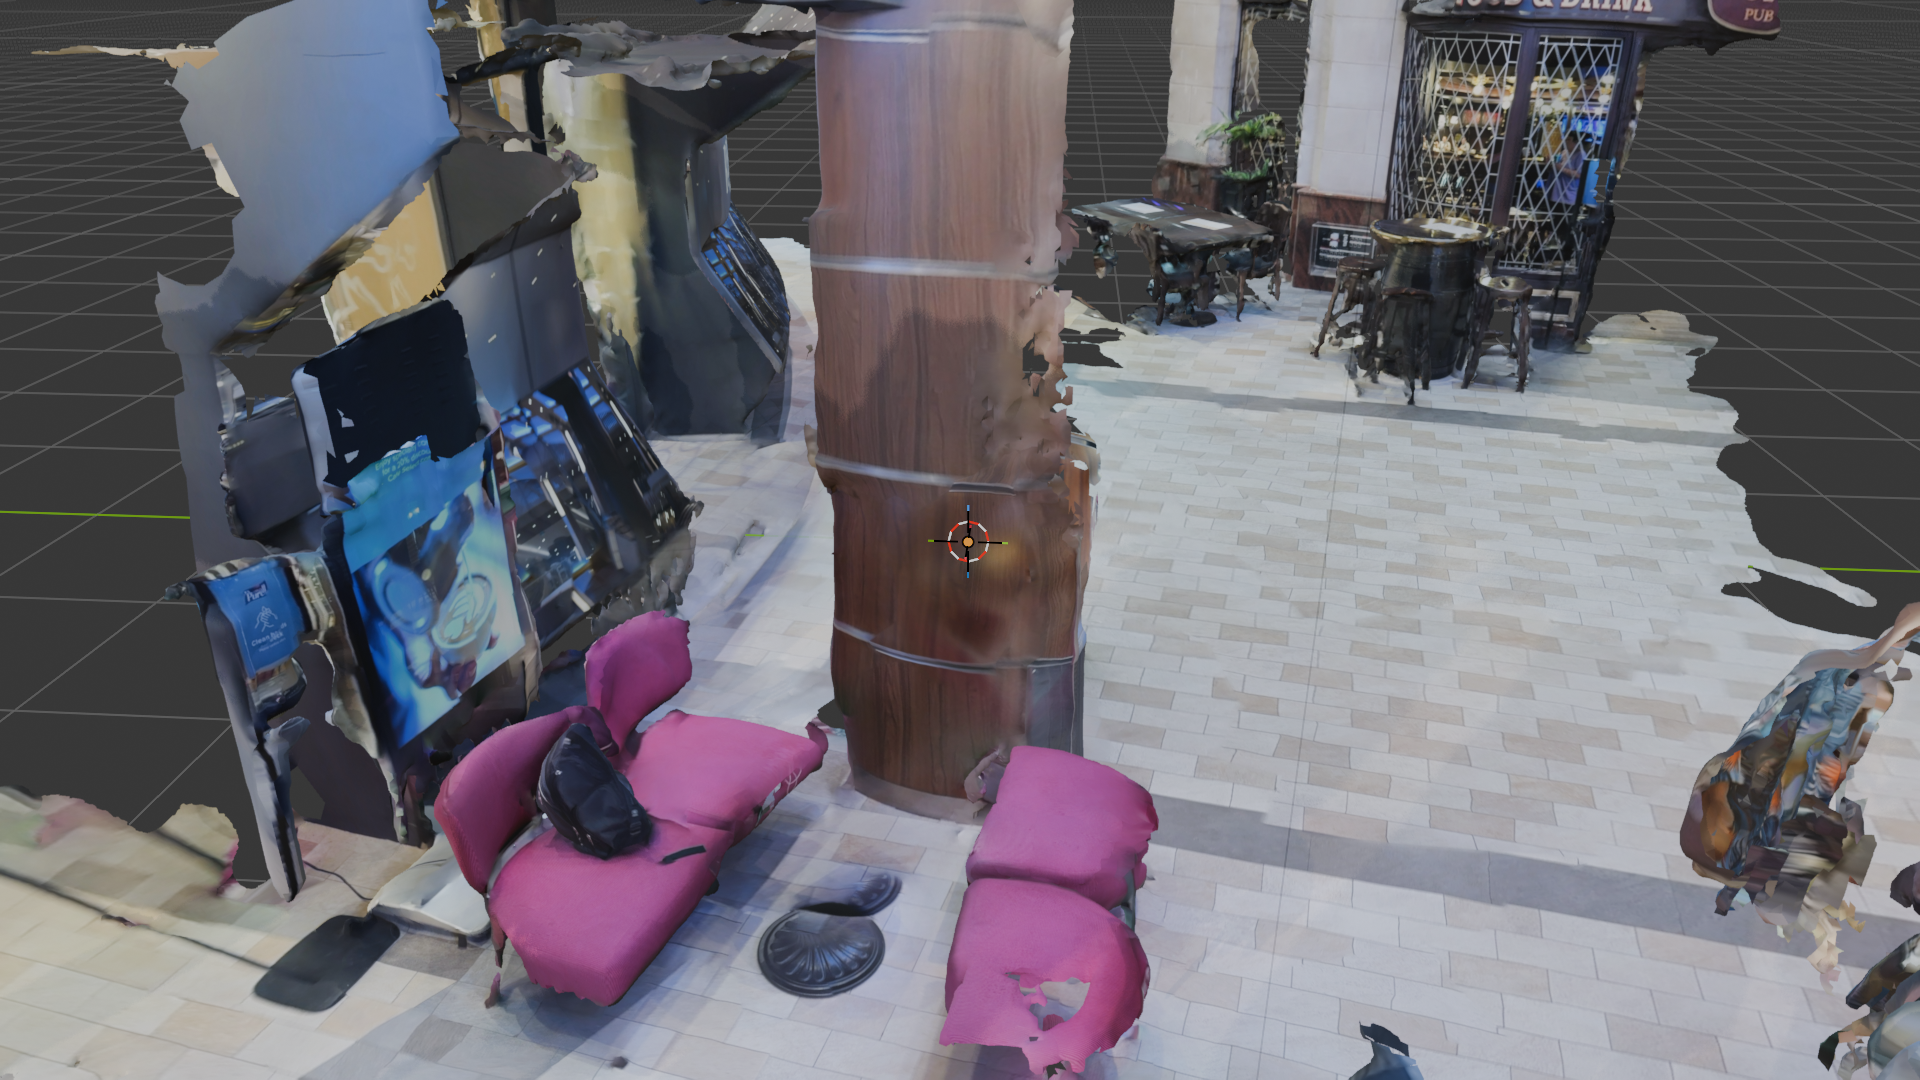
A cluster of pink lounge chairs and a wood pillar on the main promenade. Small enough to scan in one sweep, geometrically varied enough to test reconstruction, and a real place I happened to be standing in rather than a staged demo subject. Two-minute capture, launch to mesh on disk.
The scan came back patchy. Holes in the wall behind the chairs, the floor drops off in the foreground, one chair has a chunk missing from its back. That’s exactly what a first-attempt LiDAR sweep looks like when the operator walks at normal indoor pace instead of slowing down. I knew this in the abstract, but I’d never done it myself, so I made the canonical mistake and the canonical mistake is on the page now. I considered rescanning and decided against it. The patchy version is what every developer’s first attempt at this pipeline looks like, and it’s what makes the friction log below readable as a real workflow.
Friction notes (the actual DevRel content)
Every place I got stuck, what surprised me, what a doc-fix would be.
Scaniverse defaults push you toward the NEW (cloud + Gaussian splat) experience even when mesh + on-device is the right pick. The “Classic” option is the right answer for a USDZ → Blender → Omniverse workflow, but it’s visually de-emphasized. A less-experienced user would pick NEW and get stuck with splat outputs that don’t import cleanly into NVIDIA Omniverse Kit. Doc-fix: add a “which experience for which workflow” table to the getting-started guide.
Inside Classic, the Splat-vs-Mesh decision repeats the same trap. Splat is visually defaulted (orange gradient). Mesh is labeled only “more export options” with no hint that it’s the USDZ-compatible path. Doc-fix: annotate the modes with their downstream-tool compatibility.
First-time LiDAR scans are patchy because users walk at normal indoor pace. Scaniverse offers no in-app coaching during the sweep, no slow-down prompts, no coverage heat-map. Doc-fix: a 30-second “how to capture well” overlay on first launch would meaningfully improve first-scan quality.
Scaniverse USDZ exports with a deeply implementation-specific root prim name (e.g. Scaniverse_2026_05_31_101502). For downstream USD reference workflows you want stable, semantic prim names. Doc-fix: add a “root prim name” field to the export dialog, defaulting to scan title.
Blender’s first-time-render UX has three small frictions that stack. First: Blender renders from the scene CAMERA, not your viewport view, so the first render of an imported scan shows a random crop instead of what you’re looking at. Second: Blender has two distinct “View” UI elements: the View menu in the viewport header (which contains the right command, “Render Viewport Preview”) and the View tab in the N-panel sidebar (focal length, viewport lock). New users reach for the sidebar tab. Third: Blender 5.x renamed “Viewport Render Image” to “Render Viewport Preview”, so every tutorial older than this year uses the wrong name. Doc-fix: USD importer should optionally add a camera positioned to frame the imported bounds; the sidebar tab should be renamed “Viewport”; the 5.x changelog should prominently flag UI label changes.
Doing all of this from a cruise ship on satellite WiFi is a real-world DevRel constraint nobody’s blog post mentions. Cloud-GPU rentals become impractical. Offline-capable tooling (Scaniverse on-device, Blender local, usd-core CPU) is the only viable path. This validates the “Mac CPU is enough for the OpenUSD literacy track” hypothesis.
The cross-domain connection
The architectural pattern OpenUSD describes is the same architectural pattern model-driven network management has been describing for the last decade. Different vocabulary, different use cases, same load-bearing idea. Once you see it, you can’t unsee it.
In network automation, the canonical version of this lives in NSO and YANG. Model is the source of truth. Multiple teams extend it with additional opinions (YANG augments, service templates, layered configs) without anyone forking the source. Composed result is deterministic. The whole architecture exists because the alternative (every team writing imperative scripts that mutate device state directly) doesn’t scale.
OpenUSD says the same thing about 3D content. Stage is the composed source of truth. Composition arcs (references, sublayers, variants, payloads) let independent teams contribute opinions without forking the source asset. Composed result is deterministic. Same alternative, same scaling failure, just artists instead of engineers.
The three sharpest analogies:
- OpenUSD Stage ↔ NSO’s CDB. Both are the composed source of truth that every other tool reads from non-destructively.
- OpenUSD composition arcs ↔ YANG
augment+ NSO service templates. Mechanisms for stacking opinions without forking the source. - OpenUSD’s “non-destructive pipeline” framing ↔ model-driven network management. Declarative source of truth, deterministic merge of overrides, downstream tools never write back to the model.
The analogy lands at the architectural altitude and weakens in the specifics: USD’s LIVRPS composition ordering, time-sampled animation tracks, the Hydra render pipeline downstream all have no YANG analog. But for the first several hours of learning OpenUSD from a network-automation background, the NSO mental model accelerates the work considerably. The pieces I had to learn from scratch were the geometry-specific ones (Xform vs Mesh vs Material, Hydra rendering, USDZ packaging), not the architectural ones. That asymmetry is what makes the bridge useful.
What’s next
- Read the LearnOpenUSD composition arcs chapter, then hand-rewrite the
01_references.pyexercise from scratch. - Hand-write a
compose_scene.pythat references the cruise-promenade USDZ, adds a sublayer with one extra asset, saves the composed result back out. - Keep the friction log running.
Reach me on LinkedIn or via Sierra Code Co.